

Underwater Caustics in Poser 14 Superfly
When I created my first tutorial about underwater caustics in Superfly, Poser 14 and all earlier versions of Poser with Superfly could not do Gobo lighting. A recent update to Poser 14 now allows it (and only Poser 14) to do Gobo projection lighting in Superfly. So, here is a new and improved tutorial on how to achieve underwater caustics and more in Poser 14 with Superfly. We’ll start with the lighting caustics and then I will show you how to add a volumetric atmosphere so it will really look like it’s underwater. Make sure your Poser 14 program is updated to the latest version for all of this to work!
Step 1
We’ll begin by creating a new, completely empty scene. Make sure that “Ground” is off and that all lights have been deleted. Next, we will be adding two props to the scene from the “Primitives” folder in the Props library: a Ball and a Construct. The construct will serve as our setting and background. The ball will be used to test various settings later on. Scale up the ball so it looks a little like in my preview. (Note: You may need to change your Display Style to see the props. “Wireframe” works well for this.)
You can also morph the Construct to look more like terrain like I did using its included morph parameter dials. I edited the materials of the Construct to have a teal background and a sandy tan ground while also changing the color of the Ball to be a light gray. You’ll be able to download this sample scene via zip file at the bottom of this page to see what everything looks like once we get through all of these steps.

Step 2
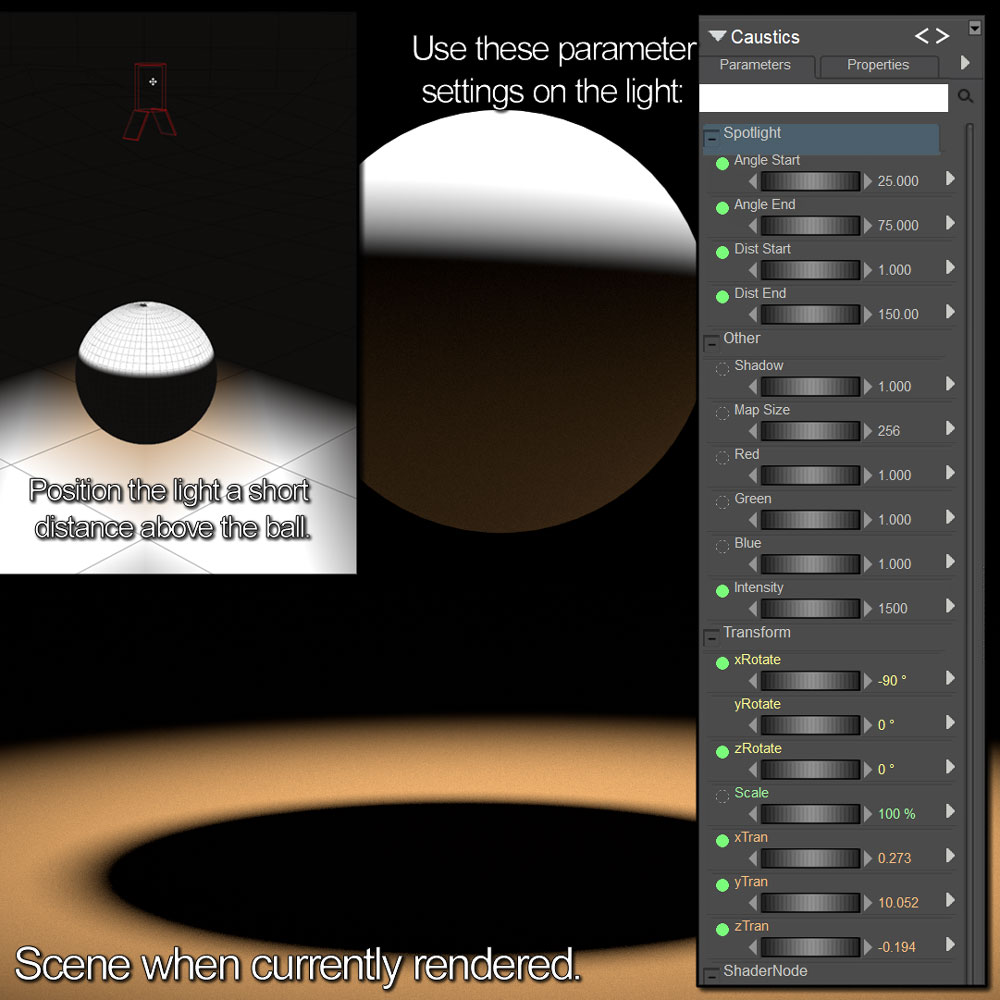
Create a new Spot type Light. You can do this by going to the menu bar at the top of the program and select “Object–>Create Light–>Spot”. Now, with the light selected, we are going to position it a bit above the top of our scene and angle it downwards. I am going to rename this light “Caustics” to make life easier.
Set the light’s Parameters as shown in the image at right. The Angle Start and Angle End will determine how straight or angled the caustics will look later on. I set Angle Start to “25” and Angle End to “75”. Dist Start and Dist End are the distance at which the light starts and ends. I set the Dist Start to “1” and Dist End to “150”. This will be one of the factors that determines the strength of the light and the caustics. Intensity needs to be very high so we’ll be able to properly see our caustics. I set mine to “1500”.
Step 3
You are going to need an image file of seamless water caustics in black and white for your Spot light. There are several free and commercial caustics generators out there. One such free generator can be found here and it is what I will use for this tutorial. Use the settings similar to seen at right or you can just use the pattern I created for this tutorial which you can download along with the other tutorial files at the bottom of this post. Experiment with the settings to get caustics accurate to your scene. The important settings to remember are “Depth” and “Amplitude”. Make sure to set your Output Width and Height to either “512” or “1024”. You do not need an image larger than 1024 pixels as it will only slow you down unnecessarily.

Step 4
With your Caustics Light still selected, go to the Material Room. Attach your black and white caustics map to the “Color” of the Light node. I also tinted the light to a nice light blue. Remember that when loading your caustics map, to set the “Custom Gamma value” to “1.00”. This is VERY important and should ALWAYS be done for all maps that cause special effects which means basically every map except diffuse maps. No other settings need to be adjusted here.

Step 5
If your Caustics look too blurry or too sharp when rendered, go to the Caustics Light’s Parameter Dials and adjust the “Scale”. Setting to a high value will blur the caustics while a low value will sharpen them. At right you can see two rendered examples of 100% Scale and 1% Scale. For this tutorial, I will set mine to 50%.

Step 6
While again in the Material Room, go to the Object dropdown and select “Atmosphere”. This is where we will create the volumetric effects! First, on the atmosphere effects by checking the “Volume_On” box. (Depth cue is not needed for this.) Next you need to set your “Volume_Color” to something. I decided to get fancy and create a mottled green and blue shader setup. You can set yours to a solid color if you like or copy my settings at right (this material preset will be in the file you can download at the end of this page). Next, we need to set the “Volume_Density”. I usually set it to “0.2” for a thinner atmosphere or “0.08” for something a little thicker. For this tutorial, we’re going to use “0.08”. In Volume_StepSize I set it to a value of “0.05” but note that the smaller this value is, the longer it will take to render and also look better. Finally, we can set the “Volume_Noise” value to either “0.2” or “0”. Zero will obviously give you no noise for a very smooth look. I set mine to a value of “0.2” for a touch of noise to make it look a little more like ocean water. NOTE: you won’t be able to see the volumetric effects in the preview window. You will need to render the scene in order to see anything.

Step 7
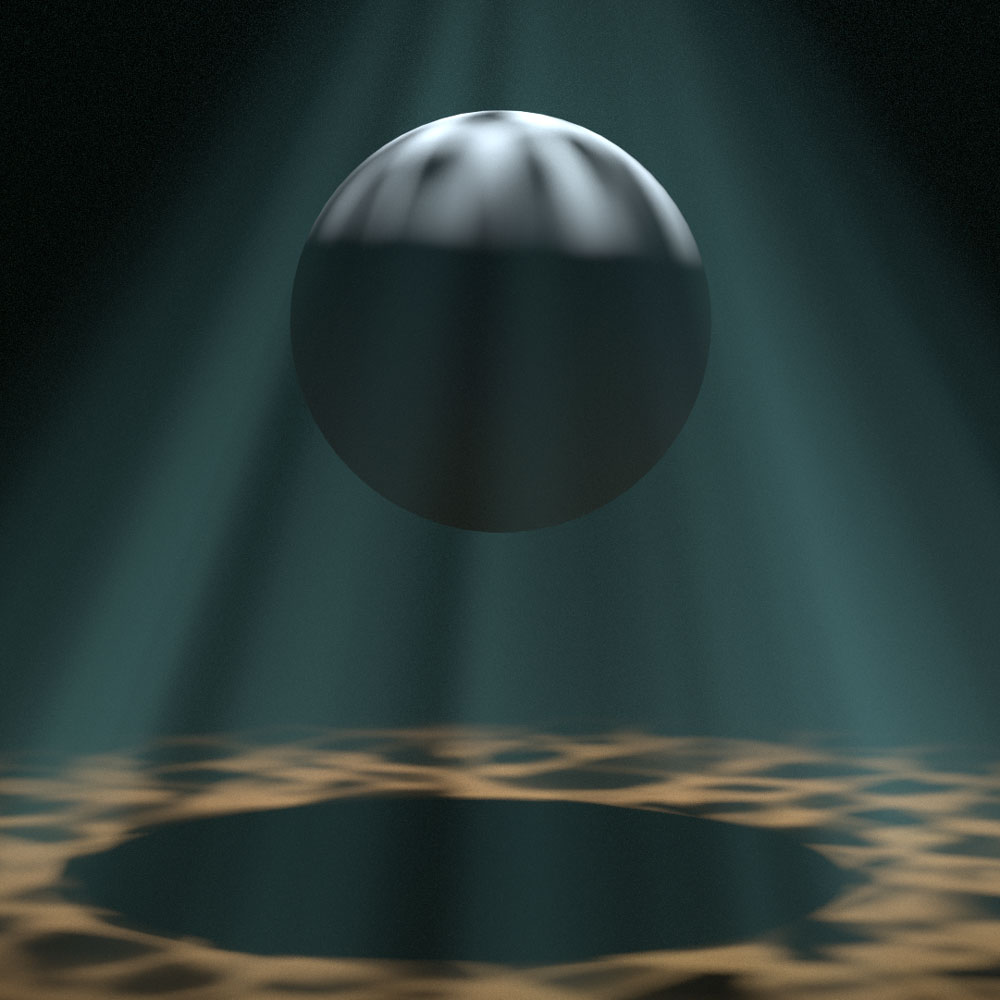
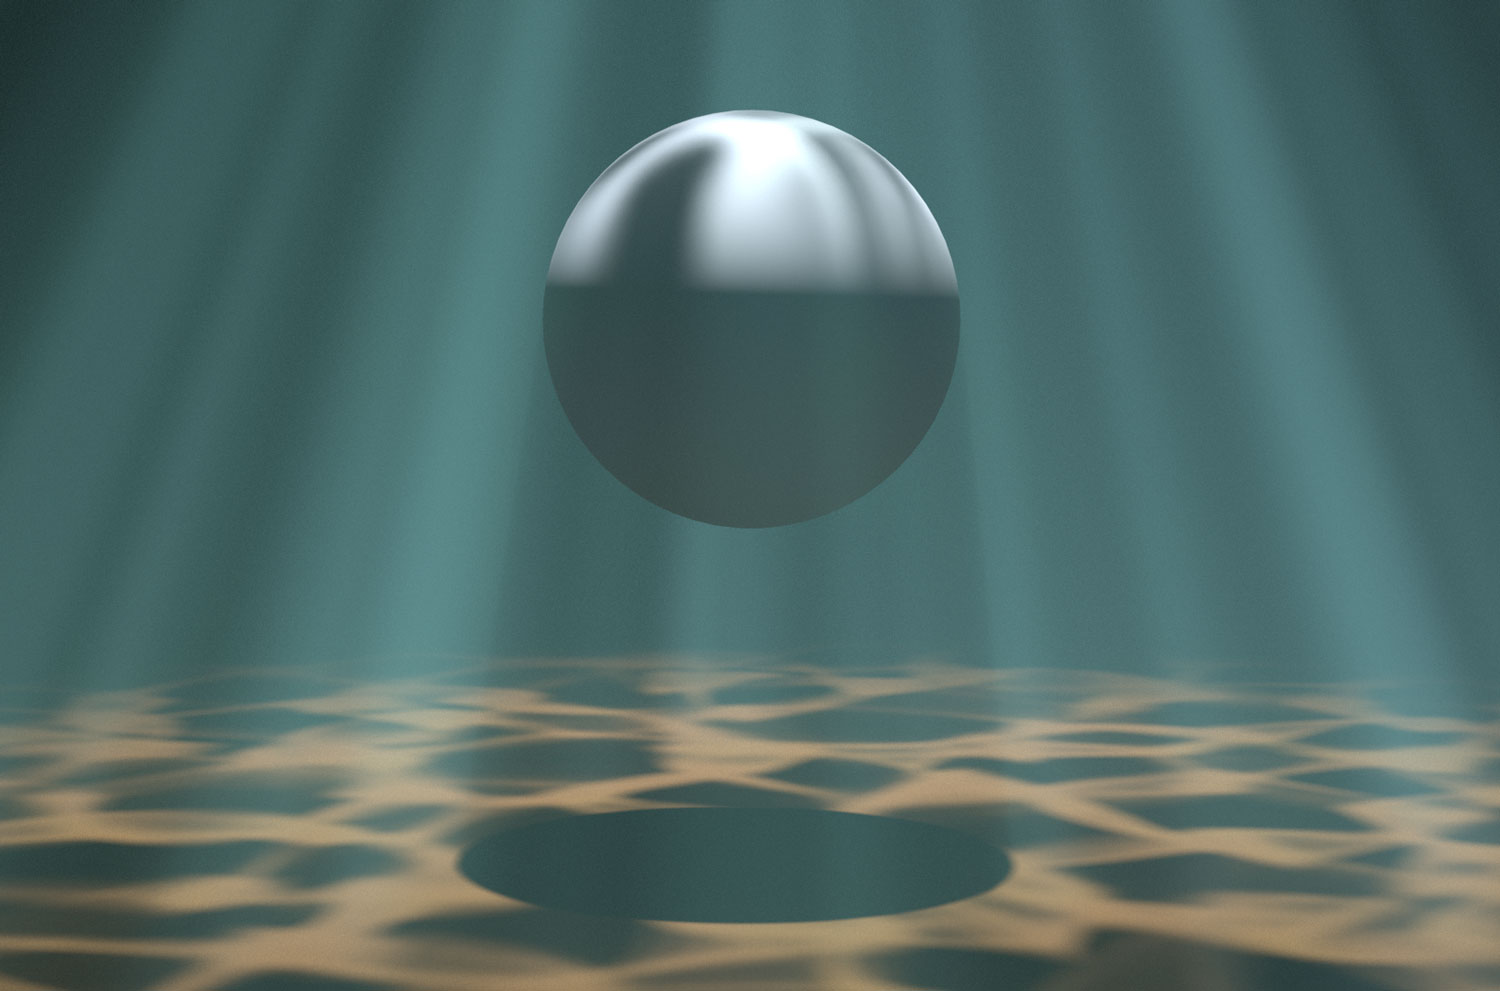
This is how it should look if you’ve followed along with all of my settings. I thought the column looked a little too thin at top, so I fixed that by moving the light upwards. To do that, increase the yTran value (which I set to “17.5”) or drag it with the Move tool. Note that this will affect the edges of the ball’s shadow. Experiment with the distance of the light to get the look you want/need.
Step 8

If you found this tutorial helpful:
Learn How to Support This Artist
or
Leave a Comment on This Post
Otherwise, feel free to share the link to this post using the “Share this:” buttons below this post to spread the word. The more viewers, the merrier! You can also find loads of 3D resources like I use at Renderosity. Feel free to visit via my affiliate link below this paragraph. Thank you!

